Export from Creo

Step 1: Apply materials

Add CREO PARAMETRIC to differentiate different parts.

Meshroom VR uses the different materials applied by CREO PARAMETRIC to your model to identify the different parts. On each part, you will be able to drag’n’drop a Weviz material.


Make sure that each part of your 3D project is associated with a material.

To apply your material:

Go to the View tab.

Click on Appearances.

Select the required material then choose your part to edit.

Click Ok in the little window to assign the material.

*It is those colors and textures that Meshroom VR will use to identify the different parts of your model.

Step 2: QUALITY EXPORT


Do not triangulate too much!

Unlike in rapid prototyping, low tessellation

Before exporting in OBJ, choose the tessellation level:

In the export waterfront window, set the lowest value about the Chord Height.

Click on Apply to see results.

Step 3: FORMAT .OBJ

Export only what you need!

Remove all useless objects from your export. If you want to validate the exterior shape of a design, it would be useless to import all the machinery hidden inside!

To export your 3D project:

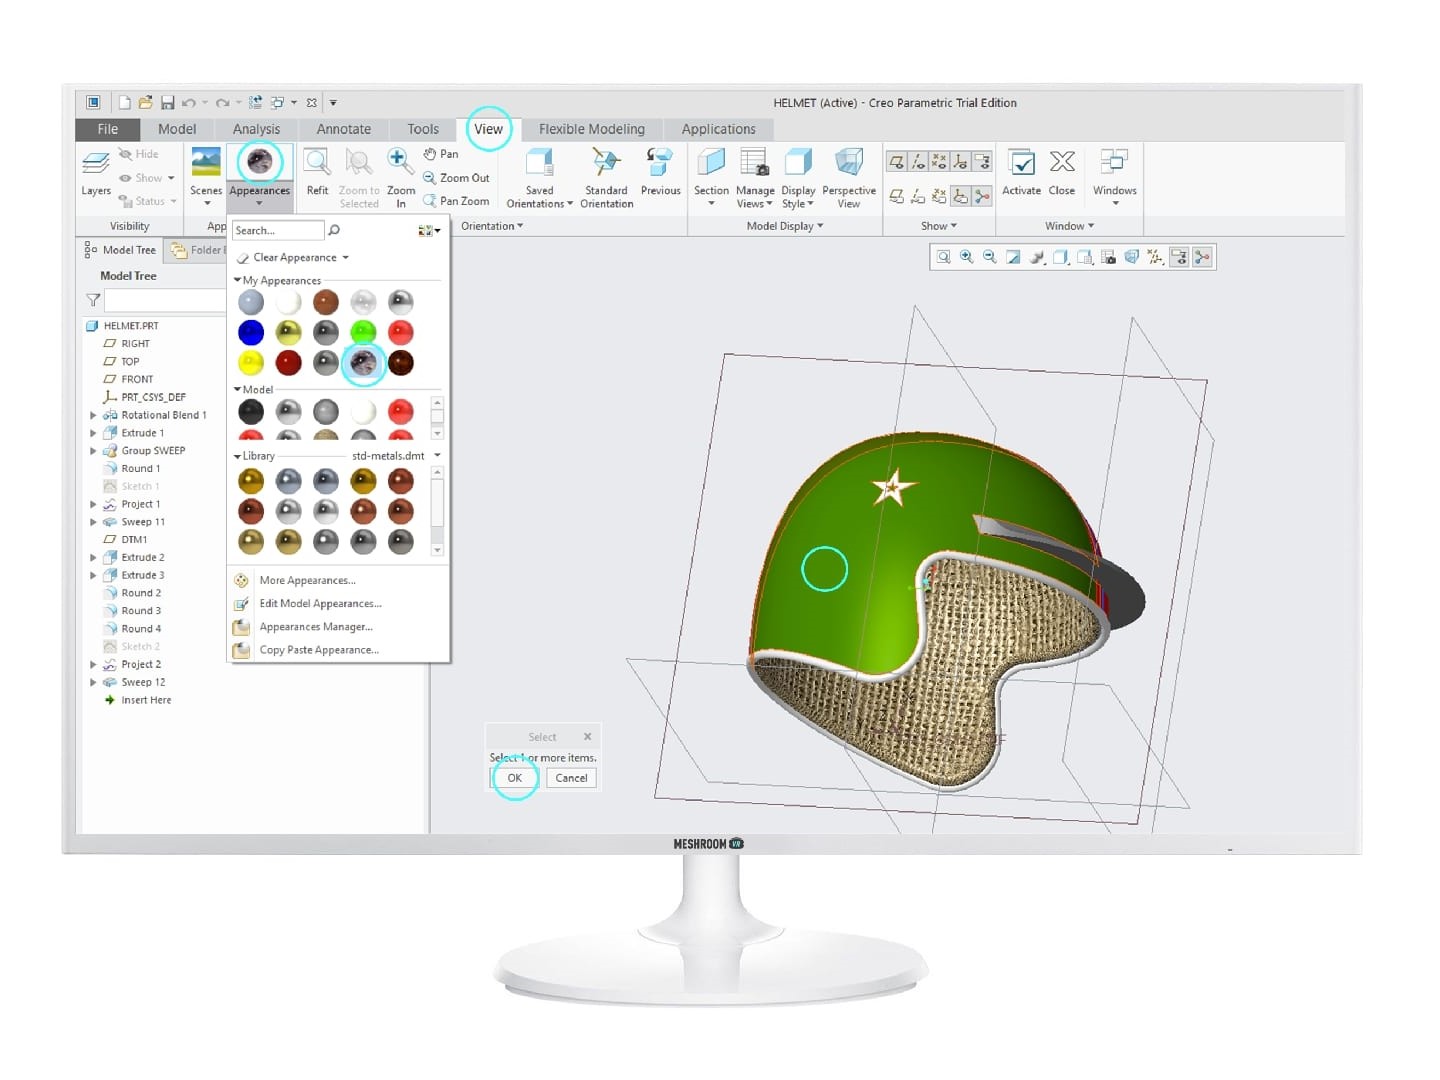
(Select only surfaces you want to export)

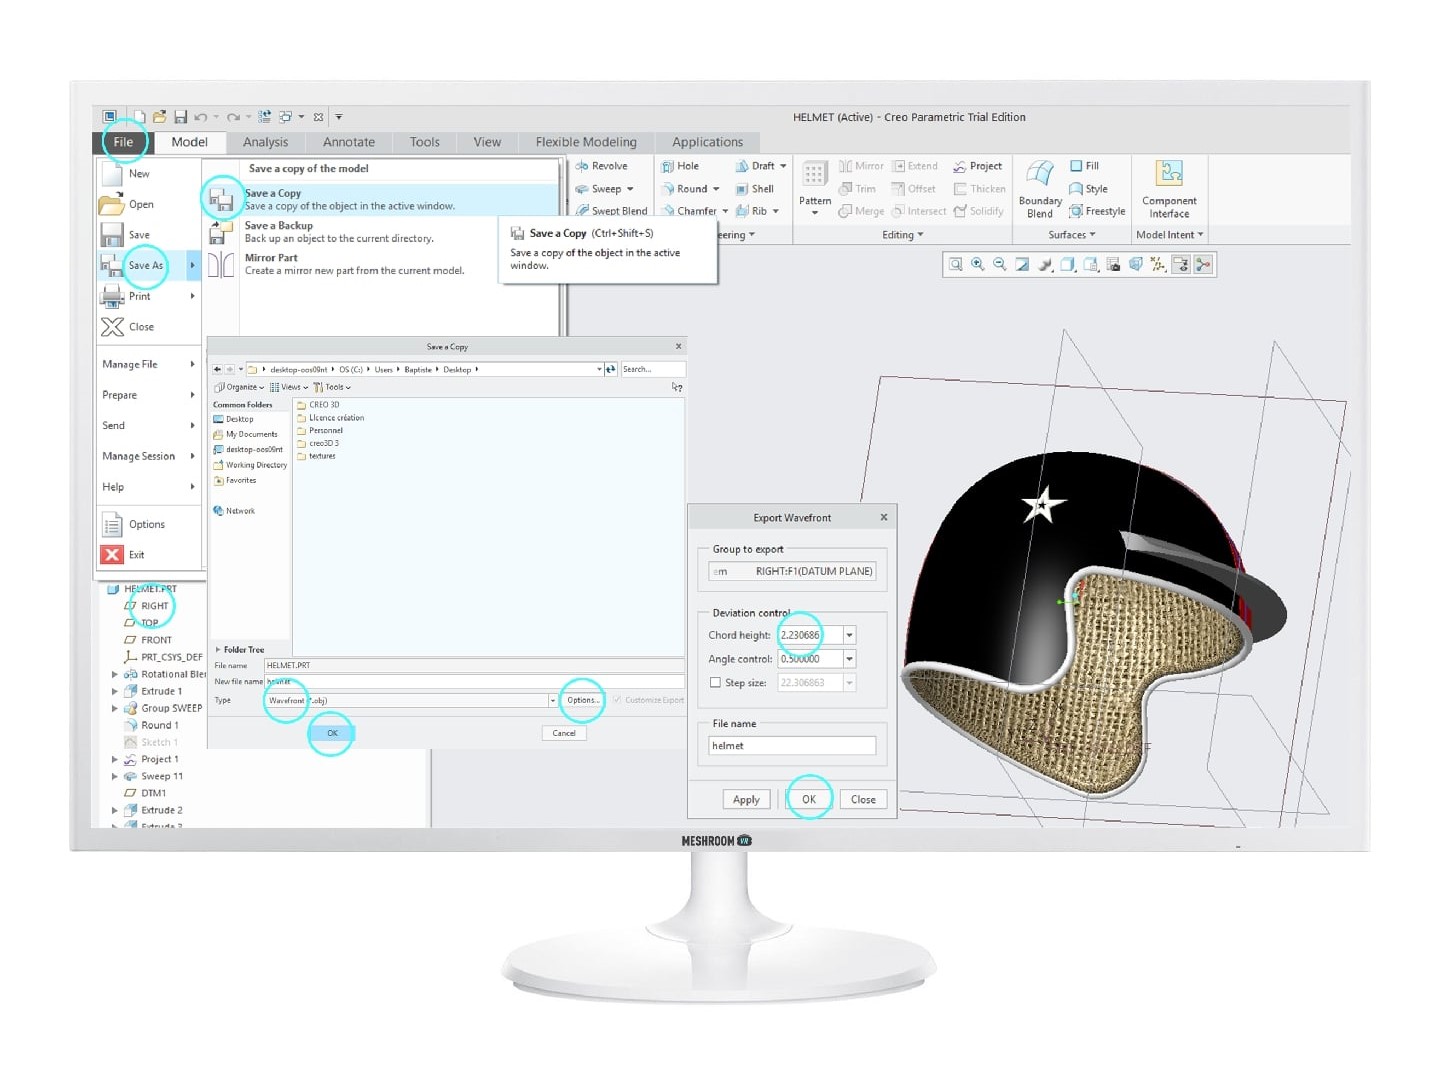
Go to > File > Save as > Save a copy.

Select Wavefront (*.obj) in Type.

Check «Customize Export» then OK to open the Export Wavefront dialog box (if the dialog doesn’t appear, select a datum plane to open it: example > Right)

Set the tessellation level (Step 2).

Click OK.

Start typing and press Enter to search

Shopping Cart

No products in the cart.